Physical Address
304 North Cardinal St.
Dorchester Center, MA 02124
Physical Address
304 North Cardinal St.
Dorchester Center, MA 02124
Addressing a Roborock that is not charging can be a frustrating challenge for owners. When faced with this issue, it is essential to systematically troubleshoot potential causes to identify the underlying problem.
From inspecting the power source to examining the charging contacts and ensuring proper alignment on the base, each step plays a crucial role in resolving the charging dilemma.
However, if these basic solutions do not yield results, exploring more advanced techniques or seeking assistance from professional support channels may be necessary to restore the Roborock to its efficient charging state.
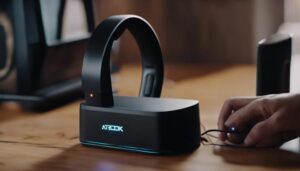
To ensure efficient charging of your Roborock, begin by verifying the functionality of the power source. Check the power outlet by testing it with another electronic device to rule out any issues with the outlet itself. Additionally, inspect the power cord and plug for any damage that could potentially impede the charging process. It is essential to address any power interruptions or fluctuations that may be occurring, as these can prevent the Roborock from charging properly.
Furthermore, confirm that the power adapter is securely connected to both the charging dock and the power source. This connection must be stable to facilitate uninterrupted charging. Moreover, ensure that the power source meets the voltage requirements specified for the Roborock. The device's efficient charging depends on receiving the correct voltage input. By adhering to these steps and addressing any issues with the power source, you can troubleshoot and resolve charging issues with your Roborock effectively.
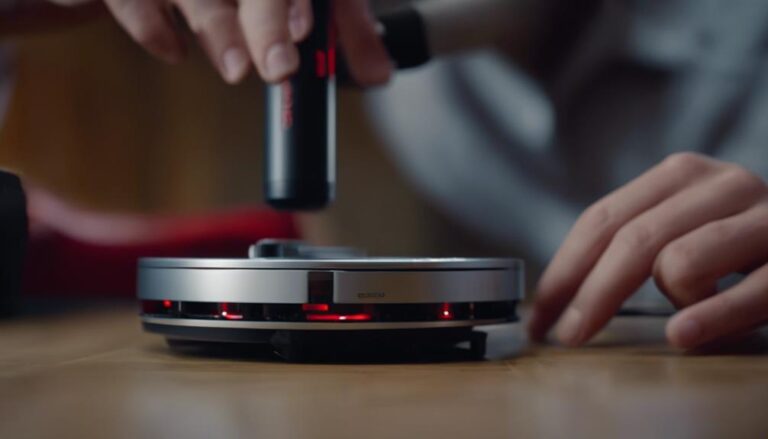
Cleaning the charging contacts on your Roborock can significantly enhance its charging efficiency and overall performance. To clean the charging contacts effectively, use a cotton swab or soft cloth dampened with alcohol. Gently wipe the contacts to remove any dirt, dust, or debris that may be hindering connectivity. It is crucial to ensure that the charging contacts are completely dry before attempting to charge the robot again to prevent any damage. Avoid using harsh chemicals or abrasive materials as they can harm the contacts.
Regularly checking and cleaning the charging contacts is essential to prevent charging issues and maintain efficient performance. By keeping the contacts clean, you can ensure a strong and consistent connection between the robot and the charging dock. This simple maintenance step can help resolve many charging-related problems and prolong the lifespan of your Roborock. Remember, a clean set of charging contacts is key to seamless charging and uninterrupted operation.
Proper alignment between the charging contacts on your Roborock robot and its base is crucial for efficient charging and uninterrupted operation. When these contacts are not aligned correctly, it can result in charging issues and disrupt the recharging process. Misalignment between the robot and the charging dock can prevent the establishment of a secure electrical connection, hindering the charging efficiency.
To ensure proper alignment, it is important to align the robot precisely on the charging dock. This alignment allows the charging contacts to connect accurately, enabling the flow of power from the base to the robot for effective recharging. Regularly inspect the charging contacts on both the robot and the dock to confirm they are clean and free from debris. Maintaining cleanliness in these areas helps in preserving the alignment and ensuring a smooth electrical connection, ultimately preventing charging errors and enhancing the overall charging process.
Checking the battery of your Roborock for any signs of damage or wear is crucial to address charging issues and ensure optimal performance. A faulty battery can lead to charging problems and impact the overall functionality of your Roborock. Here are some steps to consider:
Resetting your Roborock can be a useful troubleshooting step to address charging issues and restore optimal functionality. To reset the robot, locate and press the reset button on the side or bottom of the device, holding it for at least 3 seconds. This action clears any stored data and settings, which can help in troubleshooting charging problems. After resetting, remember to reconfigure your Roborock's settings and reconnect it to the charging dock to test if the issue has been resolved.
Customer support often recommends resetting the Roborock as a first step for charging-related problems. It is essential to follow the manufacturer's guidelines when performing a reset to ensure it is done correctly and effectively. By following this procedure, you can eliminate potential software glitches or errors that may be causing the charging issue. If resetting the robot does not solve the problem, further steps may be necessary, such as inspecting the motherboard or fuse.
After addressing potential software glitches through a reset, the next step in troubleshooting charging issues with your Roborock involves inspecting the motherboard or fuse for any visible damage or malfunctions. When dealing with charging problems, examining the motherboard and fuse can provide insights into underlying issues that may be hindering the charging process. Here are some key steps to follow:
To ensure proper troubleshooting of charging issues with your Roborock robot vacuum, it is recommended to power cycle both the vacuum and dock. Power cycling involves turning off the devices, waiting for a few minutes, and then turning them back on. This process can help reset any temporary glitches or errors in the charging system, potentially resolving connectivity or charging problems.
Roborock advises power cycling as a common troubleshooting step for charging issues. By restarting the robot and dock, they have a chance to begin afresh, which may help in fixing issues related to charging. This simple yet effective method can be a quick solution for Roborock not charging problems. If you encounter any charging issues with your Roborock robot vacuum, performing a power cycle on both the robot and dock could be the first step towards resolving the issue efficiently.
When troubleshooting charging issues with your Roborock robot vacuum, an essential step is to consider updating the firmware to potentially enhance charging performance and address software-related issues.
Considering the typical lifespan of a Roborock battery and the importance of maintaining optimal charging performance, replacing the battery after reaching its usage threshold is a crucial maintenance step to ensure continued efficient operation of your robot vacuum.
The Roborock battery typically lasts 2-3 years or 300-500 charge cycles before needing replacement. If your Roborock isn't charging properly or if you notice a significant decrease in its runtime, it may indicate that the battery is reaching the end of its lifespan.
Instructions for replacing the battery can be found in the user manual or online guides provided by Roborock. It's important to note that overcharging the battery can reduce its lifespan, so it's essential to follow proper charging practices to prolong its longevity.
Once you replace the old battery, make sure to dispose of it responsibly, following local regulations for electronic waste recycling. By replacing the battery at the appropriate time, you can ensure that your Roborock continues to function optimally and efficiently during its cleaning cycles.
To reset your Roborock battery, press and hold the power button for 3-5 seconds. This process can resolve charging issues by resetting the battery. Ensure the robot is off before resetting. Contact customer support if problems persist.
To manually charge a Roborock, securely connect the charging cable to the robot's charging port and a power source. Monitor the indicator light for activation. Allow the robot to charge fully before disconnecting. Resume normal use post-charging.
A robot vacuum may not charge due to dust buildup on charging contacts, misalignment, faulty outlets, extreme temperatures, or outdated firmware. Troubleshooting should include cleaning contacts, ensuring proper alignment, checking power sources, and updating software for optimal performance.
To clean Roborock charging contacts, utilize an alcohol solution or eraser to remove stains or rust. Ensure proper attachment by gently moving the robot. Regular maintenance is key to prevent charging issues. For further assessment, wipe contacts clean and send pictures if needed.
In conclusion, troubleshooting steps such as:
can help resolve a Roborock not charging issue.
Following these steps systematically can help identify and fix the underlying problem effectively.