Physical Address
304 North Cardinal St.
Dorchester Center, MA 02124
Physical Address
304 North Cardinal St.
Dorchester Center, MA 02124
When encountering the issue of a Reolink Solar Panel not charging, troubleshooting steps can be pivotal in resolving this inconvenience.
From verifying the integrity of the charging cable connections to optimizing the solar panel's exposure to sunlight, several factors could be at play.
By meticulously examining each element of the charging process and making necessary adjustments, the solution to this problem may be closer than expected.
Stay tuned to discover the comprehensive strategies that can potentially revive your solar panel's charging functionality.
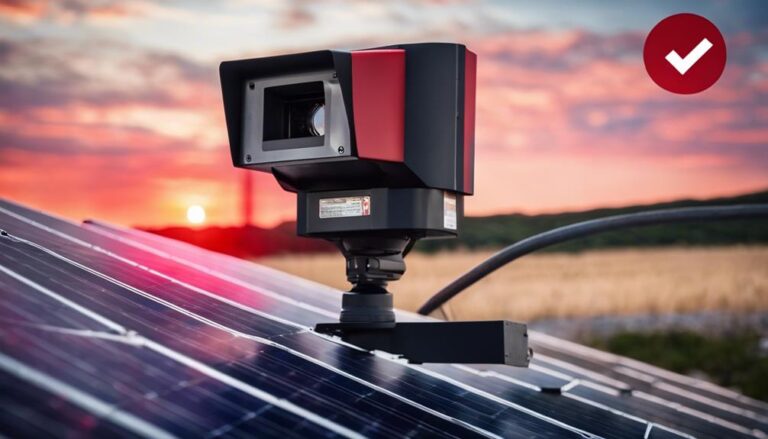
To ensure optimal charging performance of the Reolink solar panel, meticulous attention to the positioning of the solar panel in direct sunlight is paramount. Proper solar panel positioning is crucial for maximizing charging efficiency. It is essential to place the solar panel where it receives ample sunlight without any obstructions that could hinder its exposure. Adjusting the solar panel to the optimal angle ensures that it captures sunlight effectively throughout the day, enhancing its charging capabilities.
Monitoring the sun's position is key to maintaining consistent performance. Regularly checking and adjusting the solar panel's positioning is necessary to accommodate seasonal changes in the sun's path. By staying vigilant and making timely adjustments, you can maximize charging efficiency and ensure that the Reolink solar panel functions at its best capacity. Remember, a well-positioned solar panel is the foundation for effective charging and overall system performance.
When examining the Reolink solar panel, it is crucial to thoroughly inspect the connections to ensure a secure and reliable link between the solar panel and the camera.
To address connection issues effectively, consider the following steps:
Ensuring the proper functionality of the solar panel is essential in addressing charging issues with Reolink cameras.
To begin, use a multimeter to test the solar panel's output voltage and current levels. This will help determine if the panel is generating sufficient power to charge the camera effectively. Additionally, check the connection between the solar panel and the camera for any loose or damaged cables that may be impeding the charging process.
It is crucial to verify that the solar panel is receiving direct sunlight without any obstructions blocking its exposure. Monitoring the battery status indicator on the camera will also provide insight into whether the solar panel is functioning correctly.
If issues persist, consider testing the solar panel with a different camera to rule out any potential problems with the panel itself. By systematically evaluating these factors, you can pinpoint any issues affecting the solar panel's functionality and address them accordingly to ensure optimal charging performance.
Positioning the solar panel in direct sunlight is crucial for optimizing its charging efficiency. To ensure proper sunlight exposure and efficient charging for your Reolink cameras, consider the following:
To ensure optimal performance and longevity of your Reolink solar panel setup, closely monitoring the battery health is essential. You can monitor the battery status LED indicator on the camera to keep track of the battery performance. Utilize the Reolink app for real-time updates on the battery status, ensuring it is charging and discharging as expected. When charging, look for an orange light indication, and a green light signifies a fully charged and healthy battery.
If you encounter issues with charging, consider using a DC adapter as an alternative power source to ensure the battery stays operational. Regularly checking the battery level and status will help you detect any abnormalities early on and take necessary actions to maintain optimal battery health. By staying vigilant and proactive in monitoring your battery's performance, you can prevent issues such as the solar panel not charging and ensure smooth operation of your Reolink solar panel system.
Updating the camera firmware is crucial for resolving compatibility issues that may be impacting the solar panel's charging performance. Firmware updates play a significant role in ensuring the seamless operation of the camera in conjunction with the solar panel. Here are some key points to consider when updating the camera firmware:
When encountering persistent solar panel charging issues despite updating the camera firmware, seeking assistance from Reolink Customer Support can provide expert guidance and troubleshooting solutions.
Contacting Reolink customer support through phone, email, or live chat allows you to communicate specific details about the problem, enabling the team to efficiently troubleshoot the issue. Reolink's experienced and knowledgeable customer support team specializes in resolving solar panel charging issues and can offer tailored assistance.
In case initial troubleshooting steps do not resolve the problem, it is advisable to follow up with the customer support team for further guidance. Leveraging Reolink's customer support resources can effectively address and fix solar panel not charging issues, ensuring that your security system operates optimally.
The failure of a solar panel to charge a security camera may stem from insufficient sunlight exposure, shading, obstructions, incorrect connections, extreme temperatures, or debris accumulation. Regular maintenance, such as cleaning and ensuring unobstructed access to sunlight, is crucial for efficient charging.
The lack of sufficient sunlight exposure, obstructions like dust or debris on the panel, improper positioning, faulty connections, and extreme temperatures can all contribute to a solar panel not charging a battery efficiently.
To charge a Reolink solar panel, connect it to the camera using the provided cable, ensure direct sunlight exposure, monitor the battery status LED, use a 5V/2A USB charger, and adjust the panel angle for optimal efficiency.
To determine if a solar panel is charging, monitor for an orange LED light on the battery, a sun icon on the camera page in the Reolink App, a moving blue battery level bar, and a visible charging icon when the camera is connected to the solar panel.
In conclusion, troubleshooting steps such as:
can help resolve the issue of a Reolink Solar Panel not charging. By following these steps, users can effectively address the problem and ensure optimal charging efficiency for their solar panel.
These steps provide a comprehensive approach to troubleshoot and resolve the charging issue, covering different aspects that could potentially affect the solar panel's performance.