Physical Address
304 North Cardinal St.
Dorchester Center, MA 02124
Physical Address
304 North Cardinal St.
Dorchester Center, MA 02124
In this article, you’ll learn how to easily set the time on your Philips docking station. By following these simple steps, you’ll be able to ensure that your device’s clock is accurate and reliable.
Accessing the settings menu, adjusting the hour and minute, and setting the time format are just a few of the tasks we’ll cover.
Stay tuned to discover how to save and confirm the time once you’ve made the necessary adjustments.
Let’s get started!
Last update on 2024-06-23 / Affiliate links / Images from Amazon Product Advertising API
To easily check the clock display on your Philips Docking Station, simply glance at it whenever you frequently use the device. The clock display on the docking station is designed to provide you with accurate and convenient time information. When you look at the display, you’ll see the current time in a clear and easy-to-read format.
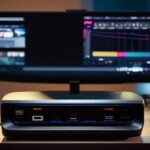
The clock display on your Philips Docking Station is located on the front panel of the device. It’s typically a digital display, showing the hours and minutes in a 12-hour format. Some models may also display the date, day of the week, or other additional information. The display is backlit, ensuring that you can easily read the time even in low light conditions.
To check the clock display, all you need to do is take a quick glance at the docking station. The display is always on, so you don’t need to press any buttons or perform any additional actions. The time will be continuously updated, ensuring that you have the most accurate information at all times.
To access the settings menu on your Philips Docking Station, you will need to navigate through the device’s menu options using the control buttons. The settings menu allows you to customize various features and functions of your docking station, including setting the time. Here’s how you can access the settings menu and set the time on your Philips Docking Station:
First, ensure that your docking station is connected to a power source and turned on.
Locate the control buttons on your docking station. These buttons are usually located on the top or front panel of the device.
Press the menu button to enter the settings menu. This button is typically labeled with a gear or menu icon.
Use the navigation buttons (usually represented by arrows) to scroll through the menu options until you find the "Clock" or "Time" option.
Press the select or OK button to enter the clock settings.
Now, let’s take a look at the table below for a visual representation of the steps involved in accessing the settings menu and setting the time on your Philips Docking Station:
| Step | Action |
|---|---|
| 1 | Ensure the docking station is powered on and connected to a power source. |
| 2 | Locate the control buttons on the docking station. |
| 3 | Press the menu button to access the settings menu. |
| 4 | Use the navigation buttons to find the "Clock" or "Time" option. |
| 5 | Press the select or OK button to enter the clock settings. |
To adjust the hour and minute on your Philips Docking Station, simply follow these steps.
First, locate the control buttons on your docking station. Usually, there will be a button labeled ‘Time’ or ‘Clock’ that you need to press to enter the time-setting mode. Once you’re in this mode, you can adjust the hour and minute individually.
To adjust the hour, look for the buttons marked with ‘+’ and ‘-‘. Press the ‘+’ button to increase the hour or the ‘-‘ button to decrease it. Keep pressing the button until you reach the desired hour. Make sure to pay attention to the AM/PM indicator to ensure you set the correct time of day.
Once you have set the hour, proceed to adjust the minutes. Look for the buttons labeled with ‘+’ and ‘-‘. Press the ‘+’ button to increase the minutes or the ‘-‘ button to decrease them. Again, keep pressing the button until you reach the desired minute.
To ensure accuracy, you can also refer to a time source such as a cell phone or computer clock while setting the time on your docking station. This will help you synchronize the time across different devices.
After you have set the hour and minute to the desired time, exit the time-setting mode by either pressing the ‘Time’ or ‘Clock’ button again or waiting for the docking station to automatically exit the mode after a few seconds of inactivity.
Your Philips Docking Station is now set to the correct time, allowing you to enjoy your music and other features with accurate time display.
To set the time format on your Philips Docking Station, follow these steps:
Once you have selected the time format option, you will be presented with a table that allows you to choose between different time formats. Here is an example of what the table may look like:
| Time Format | Description |
|---|---|
| 12-Hour | Displays time in AM/PM format. |
| 24-Hour | Displays time in 24-hour format. |
Using the navigation buttons, highlight your preferred time format in the table and press the "OK" button to confirm your selection. The docking station will then update the time display to reflect your chosen format.
Setting the time format on your Philips Docking Station is a simple process that allows you to customize how the time is displayed to suit your preferences. Whether you prefer the traditional 12-hour format or the more modern 24-hour format, the docking station provides you with the flexibility to choose the time format that works best for you.
Once you have selected your preferred time format on the Philips Docking Station, you can proceed to save and confirm the time. To save the time, press the ‘Save’ or ‘Set’ button on the docking station. This will store the current time in the device’s memory. Make sure to do this step after setting the time format to ensure that the correct time is saved.
After saving the time, it’s important to confirm that the time has been set correctly. To do this, you can simply look at the display on the docking station. The time should be displayed in the format you selected earlier. For example, if you chose the 12-hour format, the time should be shown in AM or PM.
If the time isn’t displayed correctly, you may need to repeat the steps for setting the time and saving it. Double-check that you have selected the correct time format and follow the instructions carefully. It’s also possible that the docking station may have a separate button or option specifically for confirming the time. Refer to the user manual or instructions that came with the device for more information on how to confirm the time.
To change the language on your Philips docking station, follow these steps.
First, locate the settings menu on the docking station.
Then, scroll through the options until you find the language setting.
Once you’ve found it, select the language you want to change to.
Finally, confirm your selection and the language on your docking station will be updated.
Remember to consult your user manual for specific instructions tailored to your docking station model.
Yes, you can set different alarm times for different days of the week on your Philips docking station.
This allows you to customize your alarms based on your schedule.
Simply navigate to the alarm settings on your device, and you’ll find an option to set different alarm times for each day of the week.
This feature ensures that you wake up at the desired time, depending on the day.
The maximum volume level on the Philips docking station is quite impressive. It allows you to enjoy your favorite music at a high volume without any distortion.
The sound quality is excellent, and it fills the room with rich and immersive audio.
Whether you’re hosting a party or simply want to listen to music at a louder volume, the Philips docking station has got you covered.
To adjust the brightness of the clock display on your Philips docking station, locate the settings menu. Within the menu, you should find an option to adjust the brightness.
Use the arrow keys or the touch screen to navigate to the brightness setting and select it. From there, you can increase or decrease the brightness to your desired level.
Remember to save your changes before exiting the settings menu.
Yes, it’s possible to set a snooze duration for the alarm on the docking station.
To do this, you can refer to the user manual that came with your Philips docking station. The manual will provide step-by-step instructions on how to set the snooze duration for the alarm.
Simply follow the instructions provided, and you’ll be able to adjust the snooze duration according to your preference.
In conclusion, setting the time on a Philips docking station is a simple process that can be done by accessing the settings menu and adjusting the hour and minute.
Additionally, you can choose the time format that suits your preference.
Once you have made the necessary adjustments, save and confirm the time to ensure accurate display on your docking station.