Physical Address
304 North Cardinal St.
Dorchester Center, MA 02124
Physical Address
304 North Cardinal St.
Dorchester Center, MA 02124
Facing an issue with your Ryobi 40V battery not charging can be frustrating, but there are practical steps that can be taken to address the situation efficiently. From checking the battery connections to inspecting the charger for any damage, a systematic approach can often lead to identifying the root cause of the problem.
However, sometimes the solution might require a bit more troubleshooting. Stay tuned to discover some lesser-known but effective strategies that could potentially revive your Ryobi 40V battery and get it back to full functionality.
Inspect the battery terminals meticulously to ensure they are free of any debris or corrosion, guaranteeing a secure connection for efficient charging. Clean terminals are essential for the flow of electricity between the battery and the charger. Any build-up of debris or corrosion can impede this flow, leading to ineffective charging processes.
Additionally, check for any loose or damaged wiring within the battery pack that may be obstructing the charging process. Secure and intact wiring is crucial for maintaining a stable electrical connection during charging.
Furthermore, it is imperative to inspect the battery connectors for any signs of wear or damage that could potentially affect the charging efficiency. Damaged connectors can lead to poor electrical conductivity, resulting in inadequate charging. Use a multimeter to test the voltage output of the battery connections, ensuring that the electrical connection is adequate for charging purposes.
After checking and repairing any issues with the battery connections, reassemble the battery pack securely to guarantee a stable and reliable charging process. A properly connected battery is fundamental for effective charging and optimal performance of your Ryobi 40v battery.
Upon examination of the charger for any physical damage such as frayed wires, broken connectors, or unusual odors indicating a malfunction, it is crucial to ensure its operational integrity.
Checking the charger's LED indicators to confirm they are working correctly and displaying the appropriate charging status is essential.
Additionally, using a multimeter to measure the output voltage of the charger can help determine if it is supplying the necessary power to charge the battery effectively.
It is also advisable to inspect the charging port for any signs of corrosion or debris that could be impeding the connection with the battery.
Furthermore, testing the charger with a different compatible battery can help identify if the charging issue lies with the charger itself.
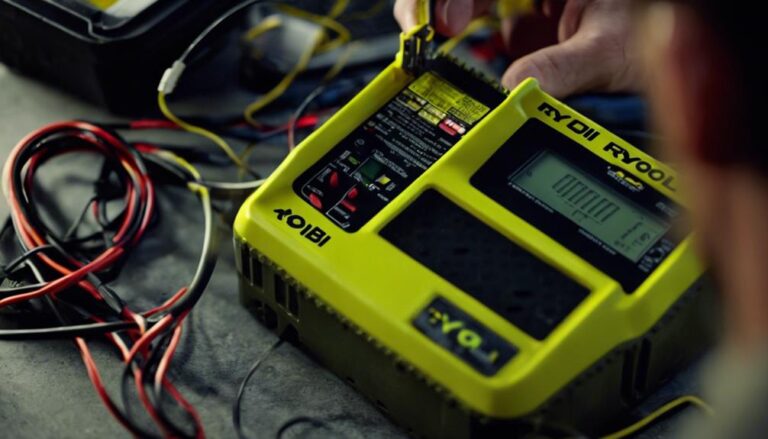
After examining the charger for any physical damage, the next step to troubleshoot a Ryobi 40V battery not charging is to reset both the battery and charger.
To reset the battery, locate the reset (RST) point on the Ryobi 40V battery. Use insulated wires to safely short-circuit the RST point, which will reset the battery. Once the reset is completed, connect the battery to the charger to kickstart the charging process.
It is essential to monitor the charging progress closely over a few hours to ensure that the recharging is successful. By following these steps, you can potentially resolve issues with your Ryobi 40V battery not charging.
To determine the source of the charging issue with a Ryobi 40V battery, testing the charger with a different functioning battery can provide crucial insights into whether the problem lies with the battery or the charger itself.
By using a known good battery, you can confirm if the charger is functioning correctly. If the charger works with a different battery, it indicates that the issue likely stems from the original battery. This test is essential as it helps eliminate uncertainty about the charger's functionality in the troubleshooting process.
Swapping batteries for testing purposes can provide valuable insights into the root cause of the charging problem. Therefore, before delving into more complex solutions, such as cleaning battery contacts, it is prudent to first conduct this straightforward test to pinpoint where the fault lies and proceed with the appropriate steps to resolve the Ryobi 40V battery not charging issue.
Ensuring optimal performance and charging efficiency for your Ryobi 40v battery involves regularly cleaning the metal contacts on both the battery and the charger using a soft, dry cloth or a cotton swab. By carefully removing any dirt, dust, or debris that may accumulate on these contact points, you can improve the connection between the battery and the charger, ultimately enhancing the charging process.
It is essential to avoid using water or cleaning solutions during this process to prevent any damage to the battery or charger components. Maintaining clean battery contacts is a simple yet effective way to prevent charging issues and extend the lifespan of your Ryobi 40v battery.
Regular cleaning of these metal contacts can help ensure a secure and efficient connection, allowing the battery to charge properly and function at its best capacity. By incorporating this maintenance routine into your battery care, you can potentially avoid common charging problems and enjoy long-lasting performance from your Ryobi 40v battery.
When facing persistent charging issues with your Ryobi 40v battery, exploring the possibility of battery replacement becomes a practical solution to restore optimal performance.
It is essential to consider the cost of a new Ryobi 40v battery, which typically ranges from $100 to $150. Additionally, evaluating the warranty status of the battery is crucial as Ryobi offers limited warranties on their products.
To make an informed decision, check for any potential discounts or promotions on Ryobi batteries for cost-effective replacements. It is also advisable to compare the price of a new battery with the cost of repairing the existing one.
In some cases, exploring aftermarket or third-party battery options can be a viable alternative to official Ryobi replacements. By weighing these factors carefully, you can determine whether a battery replacement is the most efficient and cost-effective solution to address the charging issues with your Ryobi 40v battery.
To reset a Ryobi 40V battery, locate the reset (RST) point on the battery pack. Safely short-circuit the RST point using insulated wires. Resetting the battery clears potential issues and allows for successful charging.
The Ryobi battery may not charge due to a reset issue, often indicated by blinking LEDs. Resetting the battery by short-circuiting the RST point can resolve this problem. Accessing the reset point may involve removing screws and cutting a seal on the battery.
To determine if a Ryobi 40V battery is defective, check for blinking red and green LEDs, use a multimeter to measure voltage, inspect for physical damage, consider age and usage history, and assess if it fails to hold a charge or power tools effectively.
The alternating red and green blinking lights on a Ryobi 40V charger typically indicate a fault or error during the charging process. Understanding these blinking codes is crucial for diagnosing issues with the battery or charger to resolve the problem effectively.
In conclusion, troubleshooting steps for a Ryobi 40V battery not charging include:
If these steps do not resolve the issue, consider replacing the battery.
By following these steps systematically, you can potentially resolve the problem and ensure effective charging of your Ryobi 40V battery.