Physical Address
304 North Cardinal St.
Dorchester Center, MA 02124
Physical Address
304 North Cardinal St.
Dorchester Center, MA 02124
Facing a Makita battery that refuses to charge can be a frustrating experience, especially when your tools are rendered useless. Understanding the root cause of this issue is crucial in reviving the battery's functionality.
From simple checks like ensuring proper connections to more intricate procedures involving PCB board replacements, there are steps that can be taken to troubleshoot and potentially fix the problem.
Let's explore some of these methods to regain the power needed for your Makita tools to operate efficiently.
To ensure proper charging of a Makita battery, the first step is to meticulously examine the battery connections for cleanliness and integrity. Clean and corrosion-free contacts are essential for establishing a solid connection between the battery and the charger. Any bent or damaged terminals should be addressed promptly, as they can impede the charging process. Additionally, verifying that the battery is securely inserted into the charger is crucial to ensure a stable connection throughout the charging cycle. It is also important to inspect the charger pins and battery terminals for proper alignment, as misalignment can prevent effective contact between the two components.
To troubleshoot charging issues, testing the battery in a different charger can help determine whether the problem lies with the battery or the charger itself. By following these steps and paying close attention to the condition of the battery connections, users can optimize the charging process for their Makita batteries and ensure reliable performance when using power tools.
When ensuring the proper charging of a Makita battery, the next critical step is to carefully examine the charging port for any potential impediments such as debris, corrosion, or damage that could hinder a secure connection.
It is essential to ensure that the charging pins are clean and making good contact with the battery terminals. Using a flashlight to inspect the port for any physical obstructions that could prevent a secure connection is advisable. Look closely for any bent or misaligned pins inside the charging port that may need to be straightened for a proper fit.
Additionally, testing the port with a known working charger can help determine if the issue lies with the port or the charger itself. By meticulously inspecting the charging port for any signs of blockage or damage, you can troubleshoot and address potential issues that may be causing the Makita battery not to charge properly.
Ensuring the proper maintenance of your Makita battery involves cleaning the battery contacts regularly with gentle methods to guarantee a secure electrical connection.
To achieve this, use a soft, dry cloth to wipe away any dirt, dust, or debris that may be hindering the connection. Additionally, employ a small brush or eraser to delicately scrub the metal contacts on both the battery and the charger, ensuring a reliable electrical link.
It is essential to inspect the contacts for any signs of corrosion, as this can impede the charging process. If corrosion is present, create a mixture of baking soda and water to clean the contacts effectively. Avoid using harsh chemicals or abrasive materials, as these can damage the contacts and hinder proper charging.
Testing the charger with a different known working battery can help determine the source of the charging issue for Makita batteries. By using a battery that is known to hold a charge, you can effectively assess whether the problem lies with the charger or the battery itself.
If the charger successfully charges the alternate battery, it indicates that the charger is functioning correctly. However, if the charger fails to charge the known working battery, it suggests that there may be an issue with the charger that requires troubleshooting or replacement.
This straightforward test serves to pinpoint whether the battery or the charger is causing the charging problem, streamlining the diagnosis process. It is a practical and efficient method to identify and address charging issues with Makita batteries, facilitating the maintenance and optimal performance of your power tools.
To ensure proper charging functionality for Makita batteries, verifying the power source is essential to rule out potential issues with the outlet or power supply. Start by checking the power source using a charger with a known working battery to eliminate any problems originating from the outlet or power supply. It is crucial to ensure that the charger is compatible with the specific Makita battery model and voltage requirements to prevent charging issues. Additionally, inspect the charger port and battery terminals for any visible damage or debris that could hinder the proper connection between the charger and the battery.
Moreover, examine the charger cable for any signs of fraying or damage that may impede the power flow to the battery during charging. If feasible, attempt to charge the Makita battery using a different compatible charger to determine whether the problem lies with the battery or the original charger. By systematically verifying the power source and addressing any potential issues, you can troubleshoot Makita battery charging problems effectively.
Resetting the battery memory can effectively address charging issues stemming from the memory effect in the cells.
The memory effect is a phenomenon that occurs when a battery is not fully discharged before recharging, leading to a decrease in its overall capacity.
To reset the battery memory and improve charging performance, it is recommended to completely discharge the battery and then fully recharge it.
This process may need to be repeated multiple times to fully reset the battery memory and restore optimal charging capabilities.
Additionally, regularly cycling the battery through full discharges and charges can help prevent the memory effect from occurring and maintain the overall health of the battery.
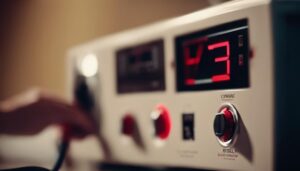
To address Makita battery charging issues related to a damaged charger, it is essential to thoroughly inspect the charger for physical damage, loose connections, or burnt components that may necessitate replacement. In addition to a visual inspection, testing the charger with a multimeter can verify if it is providing the correct voltage output for charging the Makita batteries.
If the charger is not recognizing the battery or displaying signs of malfunction, replacing it may be the most effective solution to restore proper charging functionality. When seeking a replacement charger, look for compatible options from Makita or authorized dealers to ensure compatibility and safety with the battery pack.
It is crucial to follow the manufacturer's instructions when replacing the damaged charger to prevent any risks of electrical shock or damage to the battery or charger.
Considering a battery replacement for the Makita tool system may be necessary to address persistent charging issues. In cases where the PCB board is faulty, replacing it can be the key to enabling proper charging functionality. By installing a new PCB board, the battery can once again be recognized by the charger and power tools, resolving the charging problem effectively. Ordering a replacement PCB board is crucial for restoring the Makita battery to full working order.
The process of replacing the faulty PCB board typically takes around a week or two to complete. It involves careful disassembly of the battery pack, removal of the old board, and installation of the new one. Stay updated for an upcoming video demonstration that will guide you through the steps of replacing the PCB board in the Makita battery to ensure efficient charging performance. By opting for a battery replacement when necessary, you can extend the life of your Makita tools and maintain their optimal functionality.
When faced with persistent charging issues with your Makita battery, turning to authorized Makita service centers or certified technicians for professional assistance is crucial for accurate diagnosis and effective resolution. Seeking expert help ensures that your battery problems are handled with precision and care, ultimately saving you time and preventing further damage.
Here are some reasons why professional assistance is the best course of action:
Makita batteries may cease functioning due to issues such as a faulty PCB board leading to charging and tool power failures. Low voltage readings and cell corrosion are common culprits. Unbalanced cells can hinder charger recognition.
To address a battery that won't charge, it's essential to troubleshoot the root cause. Start by testing battery cells for voltage, inspecting for corrosion, attempting a 'jump start', and addressing potential PCB board issues through replacement to restore functionality.
When a Makita battery is flashing red and green, it indicates a communication error between the battery and charger. This typically points to a faulty PCB board within the battery, which controls charging and power output.
To revive a lithium-ion battery, one can jump start it by connecting to a good battery of matching voltage. This method increases the depleted battery's voltage, potentially enabling recovery. Testing the voltage post-jump start assesses charge capacity.
In conclusion, troubleshooting and fixing a Makita battery not charging issue involves:
By following these steps, the issue can be identified and resolved effectively, ensuring proper functionality of the Makita battery.