Physical Address
304 North Cardinal St.
Dorchester Center, MA 02124
Physical Address
304 North Cardinal St.
Dorchester Center, MA 02124
When faced with the frustration of an iRobot Roomba not charging, troubleshooting the issue requires a systematic approach that considers various factors. From examining the charging contacts to ensuring a clear path for the Roomba to dock properly, each step plays a crucial role in resolving the problem.
However, beyond the basics lies a realm of advanced techniques and lesser-known tips that could hold the key to reviving your Roomba's charging capabilities. By exploring these avenues, you might uncover the solution that rekindles your Roomba's power, making the pursuit of a fully charged cleaning companion all the more rewarding.
Charging issues with the iRobot Roomba often stem from several common causes that hinder its ability to recharge efficiently. One prevalent issue is dirty charging contacts located under the front bumper. When these contacts become contaminated, it can impede the charging process, leading to the Roomba not charging correctly.
Another common cause is the need to replace the battery. Over time, the Roomba's battery may degrade, resulting in decreased charging efficiency and overall performance. By replacing the battery with a new one, the Roomba can regain its charging capabilities.
Ensuring that the charging contacts remain clean and free of debris is crucial for maintaining proper charging functionality. Additionally, regularly inspecting the battery's condition and considering a replacement when necessary can prevent charging issues from arising. By addressing these common causes promptly, Roomba owners can optimize their device's charging performance and ensure it operates at its full potential.
When troubleshooting charging issues with the iRobot Roomba, it is crucial to first address any potential causes related to insufficient power supply. Ensuring a stable power supply is essential for the effective charging of the Roomba.
Here are some steps to address insufficient power supply:
Addressing power supply issues, such as those related to the charging station and power supply, is crucial for efficiently resolving Roomba not charging problems. By ensuring a reliable power source, you can facilitate the proper charging of your iRobot Roomba.
To ensure a secure connection and efficient charging process for the iRobot Roomba, it is essential to regularly clean the silver charging contacts on both the Roomba and the docking station using rubbing alcohol and a cotton swab. Cleaning the charging contacts helps eliminate dirt and debris that may hinder the charging process, ensuring optimal performance. By maintaining these contacts, charging issues can be prevented, and the Roomba can function effectively.
After cleaning the charging contacts, it is advisable to test the Roomba to verify if the cleaning was successful. If cleaning alone does not resolve the charging problem, lightly roughing up the contacts with an emery board can help improve the connection. This additional step can be useful in cases where a simple cleaning does not suffice in addressing the charging issue.
Regular maintenance of the charging contacts is crucial for the overall functionality of the Roomba, as it directly impacts the charging process and the device's performance.
A crucial aspect to consider in troubleshooting charging issues with the iRobot Roomba is ensuring the proper installation of the battery. To effectively address this concern, follow these steps:
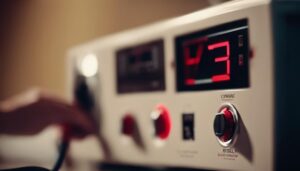
Checking for error codes displayed on the Roomba can provide valuable insights into diagnosing software problems.
When encountering software issues, a simple reset of the Roomba and its accompanying app can often resolve minor glitches.
It is essential to ensure that the Roomba's software is up to date to guarantee optimal performance.
If the problem persists, referencing iRobot's online troubleshooting resources can offer step-by-step guides tailored to address common software-related issues.
Should troubleshooting steps prove ineffective, contacting iRobot's customer support for specialized assistance with software problems is recommended.
By following these steps and remaining attentive to any error codes or notifications, users can efficiently address software-related issues that may be hindering their Roomba's charging functionality.
When troubleshooting software problems on the iRobot Roomba, identifying battery failure as a potential cause is crucial due to its common occurrence and impact on the charging functionality. Battery failure can manifest in various ways, such as the Roomba not holding a charge or failing to start altogether.
Here are key points to consider when dealing with battery issues:
Inspect the cleanliness and alignment of the charging contacts on both the Roomba and its docking station to ensure optimal charging functionality. Accumulated dirt or debris on the charging contacts can lead to charging errors.
Make sure the Roomba is correctly positioned on the docking station, ensuring that the contacts on both devices are making solid contact. If there is any misalignment, it can result in charging issues.
Additionally, cleaning the silver charging contacts with a damp cloth or rubbing alcohol can improve connectivity and help in resolving charging problems.
Always verify that the green light on the docking station is lit, indicating that power is being supplied properly. Check the charging cable for any visible damage that might impede the charging process.
Thorough maintenance of the iRobot Roomba involves meticulously cleaning the battery contacts to ensure optimal charging efficiency. To clean the battery contacts effectively, follow these steps:
For optimal charging success with your iRobot Roomba, implementing additional tips can enhance efficiency and performance. To ensure a smooth charging process, it is essential to keep the battery cover clean and free of any dirt or dust that could interfere with the charging contacts. Regularly cleaning the charging contacts on both the Roomba and the docking station is crucial for maintaining a strong connection and efficient charging. Additionally, check for any debris or obstructions that may be blocking the charging contacts, as this can prevent the Roomba from charging properly.
Rotating the Roomba to different positions on the charging dock can help establish a secure connection and improve charging efficiency. If needed, consider using a coaster or prop to align the Roomba correctly on the docking station for successful charging. By following these additional tips and maintaining a clean charging environment, you can optimize the charging process for your iRobot Roomba and ensure it stays powered up and ready to clean your home effectively.
To address a Roomba that won't charge, first, inspect charging contacts for dirt on the Roomba and dock. Ensure no obstructions hinder charging. Test the dock's functionality. Use a coaster for alignment if needed. Seek online resources for advanced troubleshooting.
To determine if your Roomba battery is bad, observe signs such as reduced runtime, flashing red indicator, or navigation struggles. Use a multimeter to test voltage output. For optimal performance, consider replacing the battery with an OEM or compatible replacement.
To reset your Roomba battery, remove the battery and press the clean button for 10 seconds. This action resets the battery memory and can help improve charging performance. Reinstall the battery and charge your Roomba as usual for optimal performance.
Yes, there are alternative methods to charge a Roomba. These include using a DC power supply with the correct specifications, a compatible replacement charger, or a USB cable connected to a power source. Always ensure proper power output and follow safety guidelines.
In conclusion, addressing common causes of charging issues such as insufficient power supply, cleaning charging contacts, checking battery installation, troubleshooting software problems, identifying battery failure, checking charging connections, and cleaning battery contacts can help resolve an iRobot Roomba not charging problem.
By following these steps and incorporating additional tips for successful charging, users can ensure their Roomba remains properly charged and operational.