Physical Address
304 North Cardinal St.
Dorchester Center, MA 02124
Physical Address
304 North Cardinal St.
Dorchester Center, MA 02124
When facing the issue of a Hover 1 not charging, it can be a frustrating setback. However, there are steps that can be taken to troubleshoot and resolve this problem effectively.
From checking the power connection to ensuring the charging port is intact, a systematic approach can often pinpoint the root cause.
By following these recommended guidelines and taking the necessary actions, you might just find the solution to get your Hover 1 back up and running smoothly.
Ensuring a secure connection between the power adapter and both the hoverboard and the power socket is crucial when troubleshooting the Hover 1 not charging issue. Begin by checking if the charger is properly plugged into the hoverboard and the power source. Look for any signs of a red light indicating that power is being received. Press the power button to see if the hoverboard responds to the charging attempt.
If the hoverboard does not show any signs of charging, inspect the charging port for any debris or damage that may be hindering the connection. It is essential to ensure that the charging port is clean and free of obstructions. If the port appears to be in good condition, try using a different power outlet to confirm whether the issue lies with the outlet rather than the hoverboard.
In some cases, the battery might need replacement if the hoverboard still does not charge after checking all connections and ports. Consider consulting a professional for battery replacement if necessary.
When troubleshooting the Hover 1 not charging issue, a critical step involves examining the condition of the charging cable to ensure it is free of damages or issues that may impede the charging process. Start by checking the charging cable for any visible damages or fraying that could affect its functionality. Additionally, make sure that the charging cable is securely connected to both the hoverboard and the power source to establish a proper charging connection. Look out for any obstructions or debris in the charging port that might hinder a solid connection with the cable.
If no visible issues are found, try using an alternative charging cable to rule out any potential problems with the original cable that could be causing the hoverboard not to charge. You can also test the charging cable with another compatible device to determine if the problem lies with the cable itself or the hoverboard's charging system. By systematically inspecting and testing the charging cable, you can pinpoint and resolve issues affecting the charging process efficiently.
To confirm proper charging conditions, validate the power source by examining its connection and functionality. Start by ensuring that the power adapter is securely plugged into a working power outlet. Check the power cord for any visible damage or fraying that may be affecting the charging process. It is crucial to verify that the power outlet is providing electricity by testing it with another device to rule out any issues with the outlet itself. If the Hover 1 is still not charging, try using a different power outlet to eliminate the possibility of a faulty outlet.
Additionally, make sure that the power adapter being used is the correct one for the Hover 1 model. Using an incompatible adapter can lead to charging issues and potentially cause damage to the device. By following these steps and ensuring a proper power source, you can troubleshoot charging problems with your Hover 1 effectively.
Restart the Hover 1 by powering it off completely through a prolonged press of the power button followed by a brief pause before turning it back on to reset the system.
Restarting the Hover 1 can effectively address minor charging issues and software glitches that may be hindering the charging process. By following the proper shutdown and startup procedures, you can ensure a successful restart of the system.
After turning off the Hover 1, allow it a few moments before powering it back on to initiate the reset process. This simple action can often rectify common charging problems experienced with the Hover 1.
If the Hover 1 continues to face charging difficulties even after restarting, it's advisable to inspect the charger, battery, and connections for any potential issues that may be impeding the charging functionality. By restarting the Hover 1, you can troubleshoot and potentially resolve charging concerns efficiently.
Initiate a reset of the charging system on your Hover-1 by disconnecting the charger from both the hoverboard and the power outlet. After unplugging, allow a few minutes to pass before reconnecting the charger to the hoverboard and plugging it back into the power outlet. Ensure that the charger is securely connected, and inspect for any loose connections or signs of damage that may impede the charging process.
Once the reset is complete, monitor the charging progress to determine if the hoverboard starts charging properly. If the issue persists and the hoverboard still does not charge, it is advisable to investigate further by checking the charger, battery, and charging port for any underlying problems. Troubleshooting these components systematically can help pinpoint the root cause of the charging malfunction and enable you to take appropriate measures to resolve the issue efficiently.
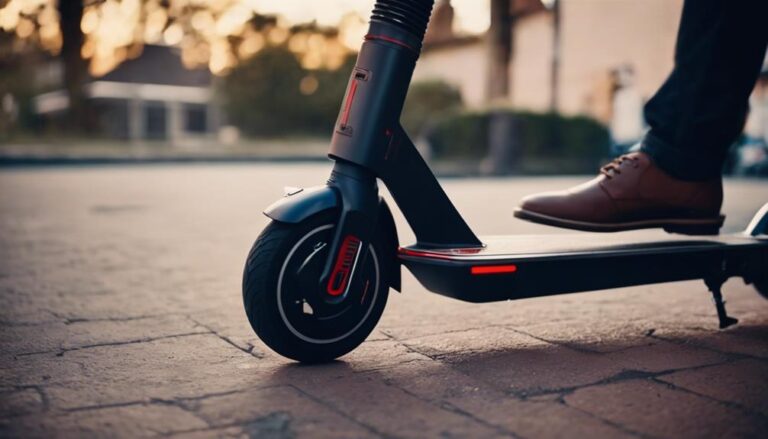
After ensuring that the charging system has been reset, the next crucial step in troubleshooting the Hover-1 not charging issue is to thoroughly clean the charging port. A clean charging port is essential for establishing an efficient connection between the charger and the Hover-1 electric scooter.
To clean the charging port, use a small brush or compressed air to remove any dirt or debris that may have accumulated inside. Inspect the port carefully for any physical damage or corrosion that could be obstructing the connection. Ensure that the charging cable plugs securely into the port without any obstructions, as a proper fit is vital for effective charging.
Regularly cleaning the charging port is recommended to prevent any buildup that could interfere with the charging process. By maintaining a clean and undamaged charging port, you can ensure a stable and efficient charging experience for your Hover-1.
To enhance the functionality and performance of your Hover-1 electric scooter, consider updating its firmware. Firmware updates play a crucial role in addressing charging issues by rectifying underlying software bugs that may hinder the charging process. By updating the firmware, you can not only resolve specific charging issues but also improve the overall performance and stability of your Hover-1.
To initiate the firmware update process, it is advisable to visit the manufacturer's website or contact customer support for detailed instructions. Following the provided guidelines meticulously is essential to prevent any potential complications during the update. Regularly updating the firmware of your Hover-1 ensures that it continues to operate at its optimal level and prevents any unforeseen issues from arising.
Considering the importance of power source in addressing charging issues, one effective solution for a Hover-1 electric scooter that is not charging is to replace the battery.
To successfully replace the battery, follow these steps:
Ensure a Snug Fit by closing the battery cover properly.
This process should help resolve the charging issues with your Hover-1 electric scooter. By following these steps meticulously, you can replace the battery effectively and potentially restore the charging functionality of your scooter.
Seeking assistance from certified technicians or authorized repair centers is crucial in addressing and resolving complex charging issues with Hover-1 electric scooters. When Hover-1 scooters are not charging properly, it is essential to turn to professionals who have the expertise to troubleshoot the problem accurately.
Authorized repair centers have the necessary knowledge to diagnose charging issues effectively, identify faulty components within the system, and recommend appropriate solutions. By seeking professional help, owners can ensure that their Hover-1 scooters receive quality repair work and genuine replacement parts, often covered under warranty.
Professional assistance not only saves time and effort but also guarantees that the charging problems are addressed efficiently. Therefore, when faced with charging issues on a Hover-1 electric scooter, it is advisable to reach out to authorized repair centers or technicians for expert support in resolving the issue.
The Hover-1 battery may fail to charge due to issues with the charger, charging port, or electrical connections. Regularly inspect for faults, ensuring the use of the correct charger and adhering to charging guidelines. Seek professional assistance if problems persist.
No, there is no physical reset button on a Hover-1 hoverboard. To reset the hoverboard, a manual reset process is required. This process involves turning off the hoverboard, disconnecting the battery, and waiting before reconnecting to resolve technical issues effectively.
A hoverboard may stop charging due to issues with the charger, charging port, battery, wiring, overcharging, incompatible charger, power supply, or charging circuit. Regular maintenance and inspection of charging components are crucial for avoiding charging problems.
To reset a hoverboard battery, power off the device, locate the power button, and hold it for 10-15 seconds. Release the button, wait briefly, then power on the hoverboard. This process recalibrates the system, potentially resolving charging issues.
In conclusion, troubleshooting Hover 1 not charging issues involves:
By following these steps, users can effectively address charging problems and ensure optimal performance of their Hover 1.