Physical Address
304 North Cardinal St.
Dorchester Center, MA 02124
Physical Address
304 North Cardinal St.
Dorchester Center, MA 02124
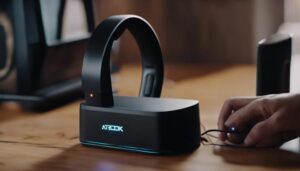
Encountering a 40V Ryobi battery not charging can be a common concern among users. From issues with battery connections to potential firmware updates for the charger, the troubleshooting process can be intricate.
However, sometimes a simple reset might just be the key to resolving the problem. Before contemplating more drastic measures like replacing the battery, exploring these initial steps could prove to be the solution you've been looking for.
Remember, a methodical approach to diagnosing the issue might just save you time and unnecessary expenses.
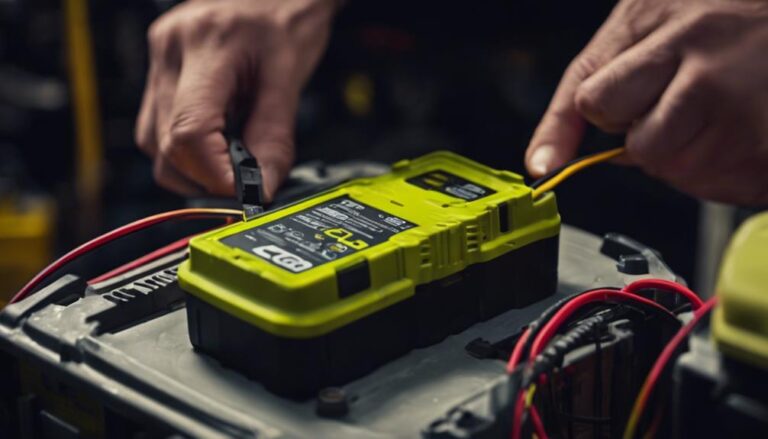
Inspect Battery Connections for Debris and Corrosion to Ensure Proper Charging Functionality. When troubleshooting a 40v Ryobi Battery Not Charging issue, checking the battery connections should be the initial step.
It is a good thing to ensure that the connections are clean and free of debris as any buildup can hinder the charging process. Corrosion on the battery terminals can also impede proper charging functionality. This step is crucial as it might be an easy fix that resolves the problem without further troubleshooting. By examining the battery connections thoroughly, you can rule out any issues related to dirt or corrosion.
If the connections appear to be in good condition, it is advisable to use a different charger to determine if the problem lies with the original charger. Taking the time to inspect and clean the battery connections now can save you time and effort next time you encounter a similar issue with your Ryobi battery.
Upon examining the 40v Ryobi battery, one should carefully scrutinize for any visible physical damage on the casing or terminals. Signs of wear, cracks, or leaking components could indicate issues that affect the battery's functionality. It is essential to check for any damage that may compromise the overall integrity of the battery.
Inspecting the battery contacts for corrosion or debris is also crucial, as these factors can hinder proper charging. Any corrosion or debris should be cleaned to ensure a good connection for charging. Additionally, ensuring that all connections between the battery and charger are secure and free of obstructions is vital for effective charging.
If any physical damage is found during inspection, it is advisable to consider repairing or replacing the damaged parts to restore the battery's charging functionality. Let's see if addressing physical damage resolves the charging issue before proceeding to other troubleshooting steps.
After examining the 40v Ryobi battery for physical damage, the next step to address charging issues is to clean the battery terminals. Cleaning the terminals is crucial as it can significantly improve the connection and charging efficiency of the battery.
Accumulated dirt, grime, or corrosion on the terminals can create barriers that hinder the charging process. To clean the terminals effectively, use a clean cloth or a small brush to gently remove any debris or residue. Ensure thorough cleaning to guarantee optimal contact when reinserting the battery for charging.
Regular maintenance of the battery terminals is essential to prevent charging issues and extend the battery's lifespan. By incorporating terminal cleaning into routine maintenance, users can enhance the overall performance and longevity of their Ryobi 40V battery.
To troubleshoot the 40v Ryobi battery not charging, consider evaluating the charger's functionality by testing it with another compatible battery. This step is crucial in determining whether the issue lies with the charger or the original battery.
Make sure the replacement battery is fully charged before testing to avoid confusion during the assessment. If the charger successfully charges the new battery, it suggests that the original battery is likely the culprit behind the charging problem.
On the other hand, if the charger fails to charge the replacement battery, it indicates that the charger itself may be faulty and requires repair or replacement. Testing the charger with a different battery helps in diagnosing and isolating the specific component causing the charging issue, leading to a more targeted and effective solution.
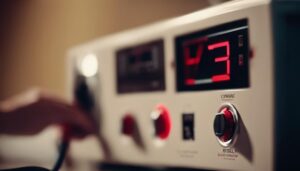
Resetting the 40V Ryobi battery can be a practical troubleshooting step to address charging issues and restore optimal functionality. To reset the battery, follow these steps:
Updating the charger firmware for your 40V Ryobi battery can significantly enhance charging performance and address compatibility issues that may be hindering the charging process. Firmware updates are essential for improving the overall functionality of the charger and ensuring optimal performance. These updates can specifically target issues such as slow charging speeds or the charger failing to recognize the connected battery. Manufacturers frequently release firmware updates to address known issues and enhance product compatibility.
To update the firmware of your Ryobi charger, check the manufacturer's website or contact customer support for guidance on the latest firmware version available. It is recommended to regularly check for firmware updates to ensure that your charger is operating at its best capacity and is compatible with your 40V Ryobi battery. By staying up to date with firmware updates, you can maximize the efficiency of your charger and prevent potential charging problems.
Consider acquiring a new charger if troubleshooting steps do not rectify the issue with your 40V Ryobi battery not charging. It is essential to ensure that the charger is in proper working condition to effectively charge the battery.
Here are some steps to guide you in replacing a faulty charger:
If these steps do not resolve the charging issue, replacing the charger may be necessary to restore proper functionality.
Have you explored the option of replacing the battery cells in your 40V Ryobi battery to address the charging issue effectively? Replacing individual battery cells can be a practical solution to revive a 40V Ryobi battery that is not charging properly.
By identifying and replacing faulty cells, you can significantly extend the battery's lifespan and restore its charging capabilities. It is crucial to ensure that the replacement cells are properly matched with the existing ones to maintain optimal performance.
This do-it-yourself approach can also be a cost-effective alternative to purchasing a brand new battery. Following a detailed step-by-step guide or tutorial specific to your Ryobi model can help you successfully navigate the battery cell replacement process.
Before embarking on this task, make sure to gather the necessary tools, take proper safety precautions, and work in a well-ventilated area. With attention to detail and careful execution, replacing the battery cells in your 40V Ryobi battery may resolve the charging issue and rejuvenate its functionality.
Opting for guidance from certified Ryobi repair specialists can provide invaluable insight into resolving intricate battery issues effectively. When facing a 40v Ryobi battery not charging problem, seeking professional repair advice ensures that the root cause of the issue is accurately identified and appropriately addressed.
Here are some reasons why consulting with a certified Ryobi repair center is beneficial:
To reset a Ryobi 40-volt battery, locate the reset (RST) point and safely short-circuit it using insulated wires. After resetting, connect the battery to the charger without reassembling to monitor progress. A successful reset should display a full charge after a few hours.
The Ryobi 40V battery may not charge due to various factors such as a need for reset, security screws limiting access, or internal issues. Resetting the battery through short-circuiting the reset point often resolves charging problems.
The Ryobi 40V charger flashing red and green without a battery can indicate a fault or communication error within the charger itself. Understanding the root cause behind this specific indicator can lead to effective troubleshooting and resolution strategies.
To determine the potential defects in a Ryobi battery, assess for blinking red and green LEDs, low voltage readings, physical damage, or corrosion on terminals. Attempt a reset by short-circuiting the RST point. Seek professional repair or replacement if issues persist.
In conclusion, troubleshooting a 40V Ryobi battery that is not charging can involve several steps:
By following these steps, you can potentially resolve the charging issue and avoid the need for a costly replacement.