Physical Address
304 North Cardinal St.
Dorchester Center, MA 02124
Physical Address
304 North Cardinal St.
Dorchester Center, MA 02124
Are you struggling to connect your Lenovo Yoga to a docking station? Don’t worry, we’ve got you covered!
In this article, we will guide you through the simple steps of setting up your Yoga with a docking station. By following our instructions, you’ll be able to enjoy the convenience of a docking station and maximize your productivity.
So let’s get started and make the connection process hassle-free!
To ensure compatibility, start by checking if your Lenovo Yoga is equipped with a Thunderbolt or USB-C port. These ports are essential for connecting your Yoga to a docking station.
Thunderbolt and USB-C ports are similar in appearance, but they have different capabilities. Thunderbolt ports are faster and support more devices, while USB-C ports are more common and versatile.
To check if your Yoga has a Thunderbolt or USB-C port, look for a small symbol next to the port on your device. The Thunderbolt port will have a lightning bolt symbol, while the USB-C port will have a USB symbol. If you can’t find these symbols, you can also check your device’s specifications online or refer to the user manual. It’s important to note that not all Lenovo Yoga models have Thunderbolt or USB-C ports, so it’s crucial to confirm your device’s compatibility before proceeding.
Once you have determined that your Yoga has a Thunderbolt or USB-C port, you can move on to the next step of connecting it to a docking station. However, if your Yoga doesn’t have these ports, you may need to consider alternative docking solutions or explore other connectivity options. It’s always a good idea to consult with the manufacturer or a computer technician to ensure compatibility and find the best solution for your specific Yoga model.
First, gather the necessary cables to connect your Lenovo Yoga to a docking station. To ensure a successful connection and optimal functionality, you’ll need the following cables:
USB-C to USB-C Cable: This cable is essential for connecting your Lenovo Yoga to the docking station. It allows for high-speed data transfer and video output, ensuring a seamless user experience.
HDMI Cable: If your docking station has an HDMI port, you’ll need an HDMI cable to connect your Lenovo Yoga to an external monitor. This cable enables you to extend or mirror your laptop’s display on a larger screen.
In addition to the cables mentioned above, it’s also worth considering the following accessories:
USB-A to USB-C Adapter: If your docking station only has USB-A ports and your Lenovo Yoga uses USB-C, you’ll need an adapter to connect the two. This adapter allows you to connect your laptop to the docking station’s USB-A ports and take advantage of its peripherals.
Ethernet Cable: If you require a wired internet connection, an Ethernet cable is necessary. It allows you to connect your docking station to your router, providing a stable and reliable internet connection.
To ensure a successful connection between your Lenovo Yoga and the docking station, it’s important to consider docking station compatibility and optimal positioning for connectivity.
Check the specifications of your docking station to ensure it’s compatible with your Lenovo Yoga model.
Additionally, position your Yoga in a way that allows easy access to the necessary ports for connection, such as the USB, HDMI, or Ethernet ports.
Make sure you position your Lenovo Yoga properly for docking station compatibility. Docking stations are designed to provide a seamless connection between your laptop and various peripherals, so it’s crucial to position your Yoga correctly to ensure a successful connection.
Here are some key considerations:
Alignment: Align your Yoga’s USB-C or Thunderbolt port with the corresponding port on the docking station. This ensures a proper physical connection between the two devices.
Orientation: Pay attention to the orientation of the docking station. Some docking stations require your Yoga to be docked vertically, while others may require a horizontal orientation.
Vertical Docking Stations: If your docking station is vertical, insert your Yoga into the dock with the screen facing outward.
Horizontal Docking Stations: If your docking station is horizontal, place your Yoga on the dock with the screen facing upward.
Following these positioning guidelines will help ensure compatibility between your Lenovo Yoga and the docking station.
To ensure optimal connectivity, position your Lenovo Yoga in a way that aligns its USB-C or Thunderbolt port with the corresponding port on the docking station. This alignment is crucial for establishing a stable connection between your device and the docking station.
Plugging the USB-C or Thunderbolt cable into the correct port ensures that all the necessary data and power signals are transmitted efficiently.
Additionally, make sure your Lenovo Yoga is placed on a stable surface to avoid any accidental disconnection during use. It’s also advisable to position your device within reach so that you can easily connect or disconnect it from the docking station without straining the cable.
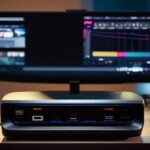
Start by plugging the docking station into your Lenovo Yoga. This will allow you to connect your laptop to various peripherals and expand its functionality. Here’s how you can connect the docking station:
Step 1: Positioning
Place the docking station on a stable surface near your Lenovo Yoga.
Ensure that there’s enough space around the docking station for the cables and connectors.
Step 2: Power Connection
Connect the power adapter to the docking station.
Plug the power adapter into a power outlet.
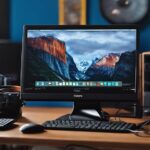
Step 3: Video Connection
Connect the video cable from your external monitor to the docking station’s video port.
Ensure that the cable is securely plugged in and tightened.
Step 4: Peripheral Connections
Plug in your USB devices, such as a keyboard, mouse, or external hard drive, into the docking station’s USB ports.
Connect your audio devices, like speakers or headphones, to the docking station’s audio jack.
If your docking station has additional ports, such as Ethernet or HDMI, connect the corresponding cables.
Step 5: Docking Station Connection
Align the connectors on the bottom of your Lenovo Yoga with the docking station’s docking connector.
Gently slide your laptop onto the docking station until it clicks into place.
Now, let’s move on to adjusting the display settings on your Lenovo Yoga after connecting it to the docking station. Once your Yoga is connected, you may need to adjust the display settings to optimize your viewing experience. Here’s a step-by-step guide on how to do it:
| Option | Description |
|---|---|
| Resolution | Adjusts the number of pixels on the screen |
| Orientation | Changes the screen orientation (landscape or portrait) |
| Scale and layout | Adjusts the size of text, apps, and other items on the screen |
| Multiple displays | Configures how your Yoga interacts with multiple monitors |
| Night light | Reduces blue light emission for a more comfortable viewing experience |
By adjusting these settings, you can tailor the display to your preferences and ensure optimal visibility and comfort while using your Lenovo Yoga with the docking station. Experiment with different options to find the settings that work best for you.
Remember to click the "Apply" button after making any changes to apply them to your display. If you’re not satisfied with the results, you can always revert to the previous settings by clicking the "Revert" button.
Now that you know how to adjust the display settings on your Lenovo Yoga, you can make the most out of your docking station experience. Enjoy your enhanced viewing experience and increased productivity!
Once you have adjusted the display settings on your Lenovo Yoga after connecting it to the docking station, you can now proceed to test and troubleshoot any potential issues. Here are some steps you can take to ensure everything is working correctly:
Test the connection:
Ensure that all cables are securely connected between the docking station and your Lenovo Yoga.
Check if the docking station’s power indicator light is on, indicating that it’s receiving power.
Verify that your Lenovo Yoga is being charged when connected to the docking station.
Check the peripherals:
Connect any peripherals, such as a keyboard, mouse, or external monitor, to the docking station and test their functionality.
If any peripherals aren’t working, try disconnecting and reconnecting them to the docking station.
Update drivers and firmware:
Visit the Lenovo support website and download the latest drivers and firmware for your docking station.
Install the updates and restart your Lenovo Yoga to ensure compatibility and optimal performance.
Troubleshoot display issues:
If you experience display issues, such as a blank screen or incorrect resolution, try adjusting the display settings on your Lenovo Yoga.
Update the graphics driver on your Lenovo Yoga by visiting the manufacturer’s website and downloading the latest version.
Seek additional support:
If you have followed the above steps and are still experiencing issues, consult the user manual or contact Lenovo support for further assistance.
To connect your Lenovo Yoga to a docking station, you’ll need to make sure it’s compatible with the specific model you have. Not all docking stations work with all laptops, so it’s important to check the compatibility before purchasing one.
Some docking stations are designed specifically for Lenovo Yoga models, while others may be compatible with a range of laptops. Make sure to do your research and choose a docking station that’s compatible with your specific Lenovo Yoga model.
To connect your Lenovo Yoga to a docking station, you’ll need specific cables. The type of cable you require depends on the model of your docking station and the ports available on your Yoga.
Common cable options include USB-C, HDMI, DisplayPort, and Thunderbolt.
Check the specifications of your docking station and Yoga to determine the appropriate cables needed for a successful connection.
When connecting your Lenovo Yoga to a docking station, it’s important to consider the position or orientation of your device. Make sure to place your Yoga in a stable position, such as on a flat surface, before connecting it to the docking station. This will ensure a secure and reliable connection.
Take care to align the connectors properly and gently push the device into the docking station until it clicks into place.
After connecting your Lenovo Yoga to the docking station, there may be some additional settings or configurations you need to adjust. This will depend on your specific setup and preferences.
You might need to adjust the display settings, audio output, or network settings to ensure everything is working properly. It’s always a good idea to check the user manual or contact Lenovo support for specific instructions on how to configure your Yoga with the docking station.
If your Lenovo Yoga doesn’t recognize or connect to the docking station after following the steps, there are a few things you can try.
First, make sure that the docking station is properly connected to your laptop.
If it is, try restarting both the laptop and the docking station.
If that doesn’t work, you may need to update your laptop’s drivers or contact Lenovo support for further assistance.
In conclusion, connecting your Lenovo Yoga to a docking station is a simple process that requires:
Following these steps will allow you to enjoy the convenience and functionality of using a docking station with your Lenovo Yoga.